 WARNING: This article may be obsolete
This post was published in 2022-03-16. Obviously, expired content is less useful to users if it has already pasted its expiration date.
前一篇文章见:
最近我又重新捡起了这个工具,对它进行了一点点改动:
Table of Contents
windowID
首先我注意到了 windowid ,这个选项能够让用户捕获特定程序的窗口:
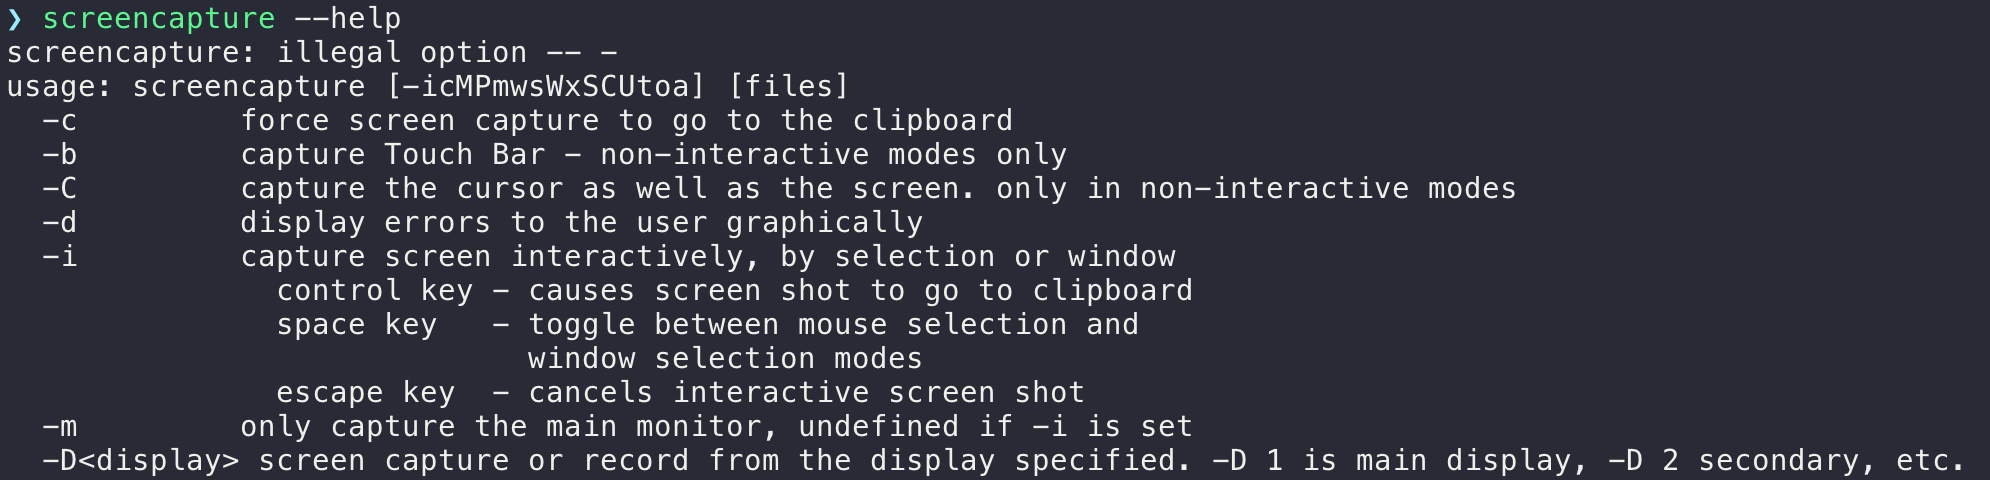
$ screencapture --help

...

  -l<windowid> capture this windowsid

...
如果声明了windowid,即使游戏窗口不显示(挂在后台),也可以截取游戏窗口的屏幕,而不是macOS当前的屏幕。 在某些特定场合,这个命令是非常有用的,可以避免截出游戏无关的画面。比如:玩一个不全屏窗口的游戏;或者玩一个“中途需要等待一定时间匹配队友的游戏”。
获取windowid的方法:通过homebrew安装GetWindowID命令,然后把它和screencapture命令组合起来:
$ screencapture -l$(GetWindowID '<application-bundle-name>' '<window-title>') -t jpg output.jpg
# 参数-C无效,因为windowid模式下鼠标无法被捕获
# <application-bundle-name>替换成你的程序包名,可以在Monitor.app里面找Process Name
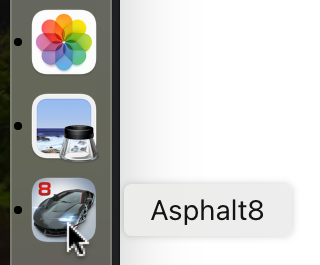
# <window-title>替换成你的窗口名称,可以把鼠标移到Dock图标上面看窗口名称Concrete Example:
Appstore游戏:Asphalt 8(狂野飙车8)
获取application-bundle-name:

获取window-title(我的Dock在左侧):
所以它的screencapture命令为:
# Appstore游戏:Asphalt 8(狂野飙车8)
$ screencapture -l$(GetWindowID 'Asphalt 8' 'Asphalt8') -t jpg output.jpg
其他例子还有:
# Steam游戏:Don't starve(饥荒)
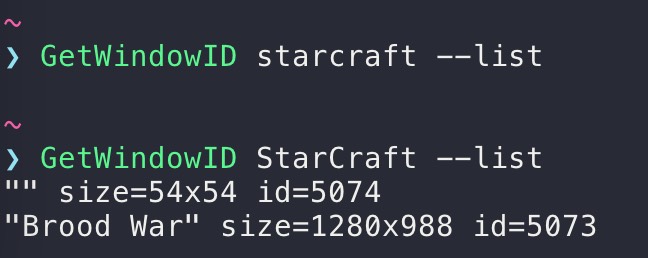
$ screencapture -l$(GetWindowID 'dontstarve_steam' "Don't Starve") -t jpg output.jpg# Starcraft: brood war (星际争霸:母巢之战)
$ screencapture -l$(GetWindowID 'StarCraft' "Brood War") -t jpg output.jpg注意application-bundle-name和window-title这两个参数区分大小写:
令人遗憾的是,windowid只适用于截图,一旦使用 screencapture -V 录制视频,windowid就会被自动忽略,无法录制特定窗口的屏幕。(目前我还没找到解决方法)
键盘绑定
在前一篇文章里,我写了一个简单的工具用于后台自动截图:
import schedule
import time

def job():
    print("Take screenshot...")
    # Do Something about screenshot
    # Screenshot code

schedule.every(10).minutes.do(job)

while True:
    schedule.run_pending()
time.sleep(1)当然,这个程序还有一些不足:它只能间隔固定时间截一张图,无法让你玩游戏的过程中临时截一张图。要想在游戏过程中临时截图,你可能需要使用其他的截图工具(比如macOS系统截图),但是这样就会导致另一个问题:截出来的图被默认被存放到了其他文件夹,和各种各样的截图被混在了一起。
所以我对这个程序进行了改进:通过使用pynput,我绑定了一个快捷键,在玩游戏的时候按下这个快捷键就能立刻截出一张图,同时不会打断原本的schedule截图计划。
🔗 [Handling the keyboard — pynput 1.7.6 documentation] https://pynput.readthedocs.io/en/latest/keyboard.html#monitoring-the-keyboard
在一段代码里同时使用schedule和pynput则需要修改schedule的使用方式(使它在后台运行),参考链接:
🔗 [Run in the background — schedule 1.1.0 documentation] https://schedule.readthedocs.io/en/stable/background-execution.html
tips:我给两个激活事件制定了不同的screencapture动作:schedule截图通过参数 -x 静默截图,而pynput截图会发出声音,告诉我手动截图成功了。
示例代码如下:
# 参考:https://schedule.readthedocs.io/en/stable/background-execution.html
# 参考:https://pynput.readthedocs.io/en/latest/keyboard.html#monitoring-the-keyboard
# 修改job()自定义截图
# 修改第59行自定义快捷键


import schedule
import time
import threading
from pynput import keyboard


def run_continuously(interval=1):
    """Continuously run, while executing pending jobs at each
    elapsed time interval.
    @return cease_continuous_run: threading. Event which can
    be set to cease continuous run. Please note that it is
    *intended behavior that run_continuously() does not run
    missed jobs*. For example, if you've registered a job that
    should run every minute and you set a continuous run
    interval of one hour then your job won't be run 60 times
    at each interval but only once.
    """
    cease_continuous_run = threading.Event()

    class ScheduleThread(threading.Thread):
        @classmethod
        def run(cls):
            while not cease_continuous_run.is_set():
                schedule.run_pending()
                time.sleep(interval)

    continuous_thread = ScheduleThread()
    continuous_thread.start()
    return cease_continuous_run


def job():
    print("Take screenshot...")
    # Do Something about screenshot
    # Screenshot code


def on_activate():
    print('Global hotkey activated!')
    job()


def for_canonical(f):
    return lambda k: f(l.canonical(k))


schedule.every(10).seconds.do(job)

# Start the background thread
stop_run_continuously = run_continuously()

hotkey = keyboard.HotKey(
    keyboard.HotKey.parse('<ctrl>+<cmd>+m'),
    on_activate)
with keyboard.Listener(
        on_press=for_canonical(hotkey.press),
        on_release=for_canonical(hotkey.release)) as l:
    l.join()
压缩图片
游戏截图大多长得花花绿绿,占用硬盘空间较大,所以我在加入了压缩图片的流程:通过homebrew安装mozjpeg,可以在python代码中调用 cjpeg 命令,每当有一张截图产生,就立刻压缩这张图片:
$ cjpeg input.jpg > output.jpg
$ rm input.jpg
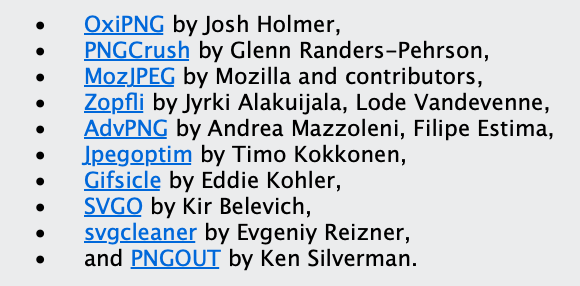
# input.jpg和output.jpg不能为相同的文件名除了mozjpeg,也可以参考使用这些工具来压缩你的jpg/png/svg: